BoilerPlate - a template for making your water heater (boiler) smarter
In Israel, as in some other countries, the use of solar water heating systems is fairly common. More than 40% of Israeli homes use it daily and save money on electricity. However, even in sunny Israel we sometimes have cloudy and cold days in the winter. For most Western Europeans, the Israeli winter will seem rather tame, but there are days when there is not enough sunshine for the solar heating system. On such days Israelis are forced to turn on an electric water heating system, or risk a cold shower. Ask Israelis about a bad winter day, and they will tell you a story about a cold shower on a cold day when the electric heater was not turned on.
Well, it happens to me too more than once. But worse than that, it happened to my wife! Of course, it was my fault, since I should have remembered to turn the electric heater on... I figured, with all the hype around smart homes, it should be easy to find and purchase a nice looking gadget, with WiFi capabilities and a mobile application to control my boiler. Indeed, there are several products that achieve this goal, however, some requires an online service subscription with monthly fees, some are very expensive, and all of them are closed proprietary systems that require trust by the users. It is not that I do not trust them, it is just that since it messes with my home electricity, I want to be in full control. I want to know exactly how it operates and I want to be able to customize it for my specific needs. I want an open sourced controller, one that can be extended and improved by the community.
Furthermore, I do not really need another fancy user interface. I would like to use the good old google calendar to set up events for turning my boiler on or off. So the idea is to simply set up boiler events in my calendar to be executed by the the controller. Some people might argue that a dedicated mobile application is a must, in which case just go ahead and add it to the repository.
Before we start with the details, a few words of caution. This is electricity we are playing with. I take no responsibility for the code, for the products that I have used to implement the controller, etc. You need to be sure you understand what you are doing, or consult with a professional, before using the controller in your home.
Now lets start...
Hardware
You need to purchase some hardware. Here is the inventory list that I have used for my prototype:
- Raspberry Pi 2 Model B - around 35$
 (Note that you can also get the Pi 3 at a similar price)
 - A 20/30A relay such as: Seeedstudio ACT05161P Grove SPDT 30A

Wiring up the relay
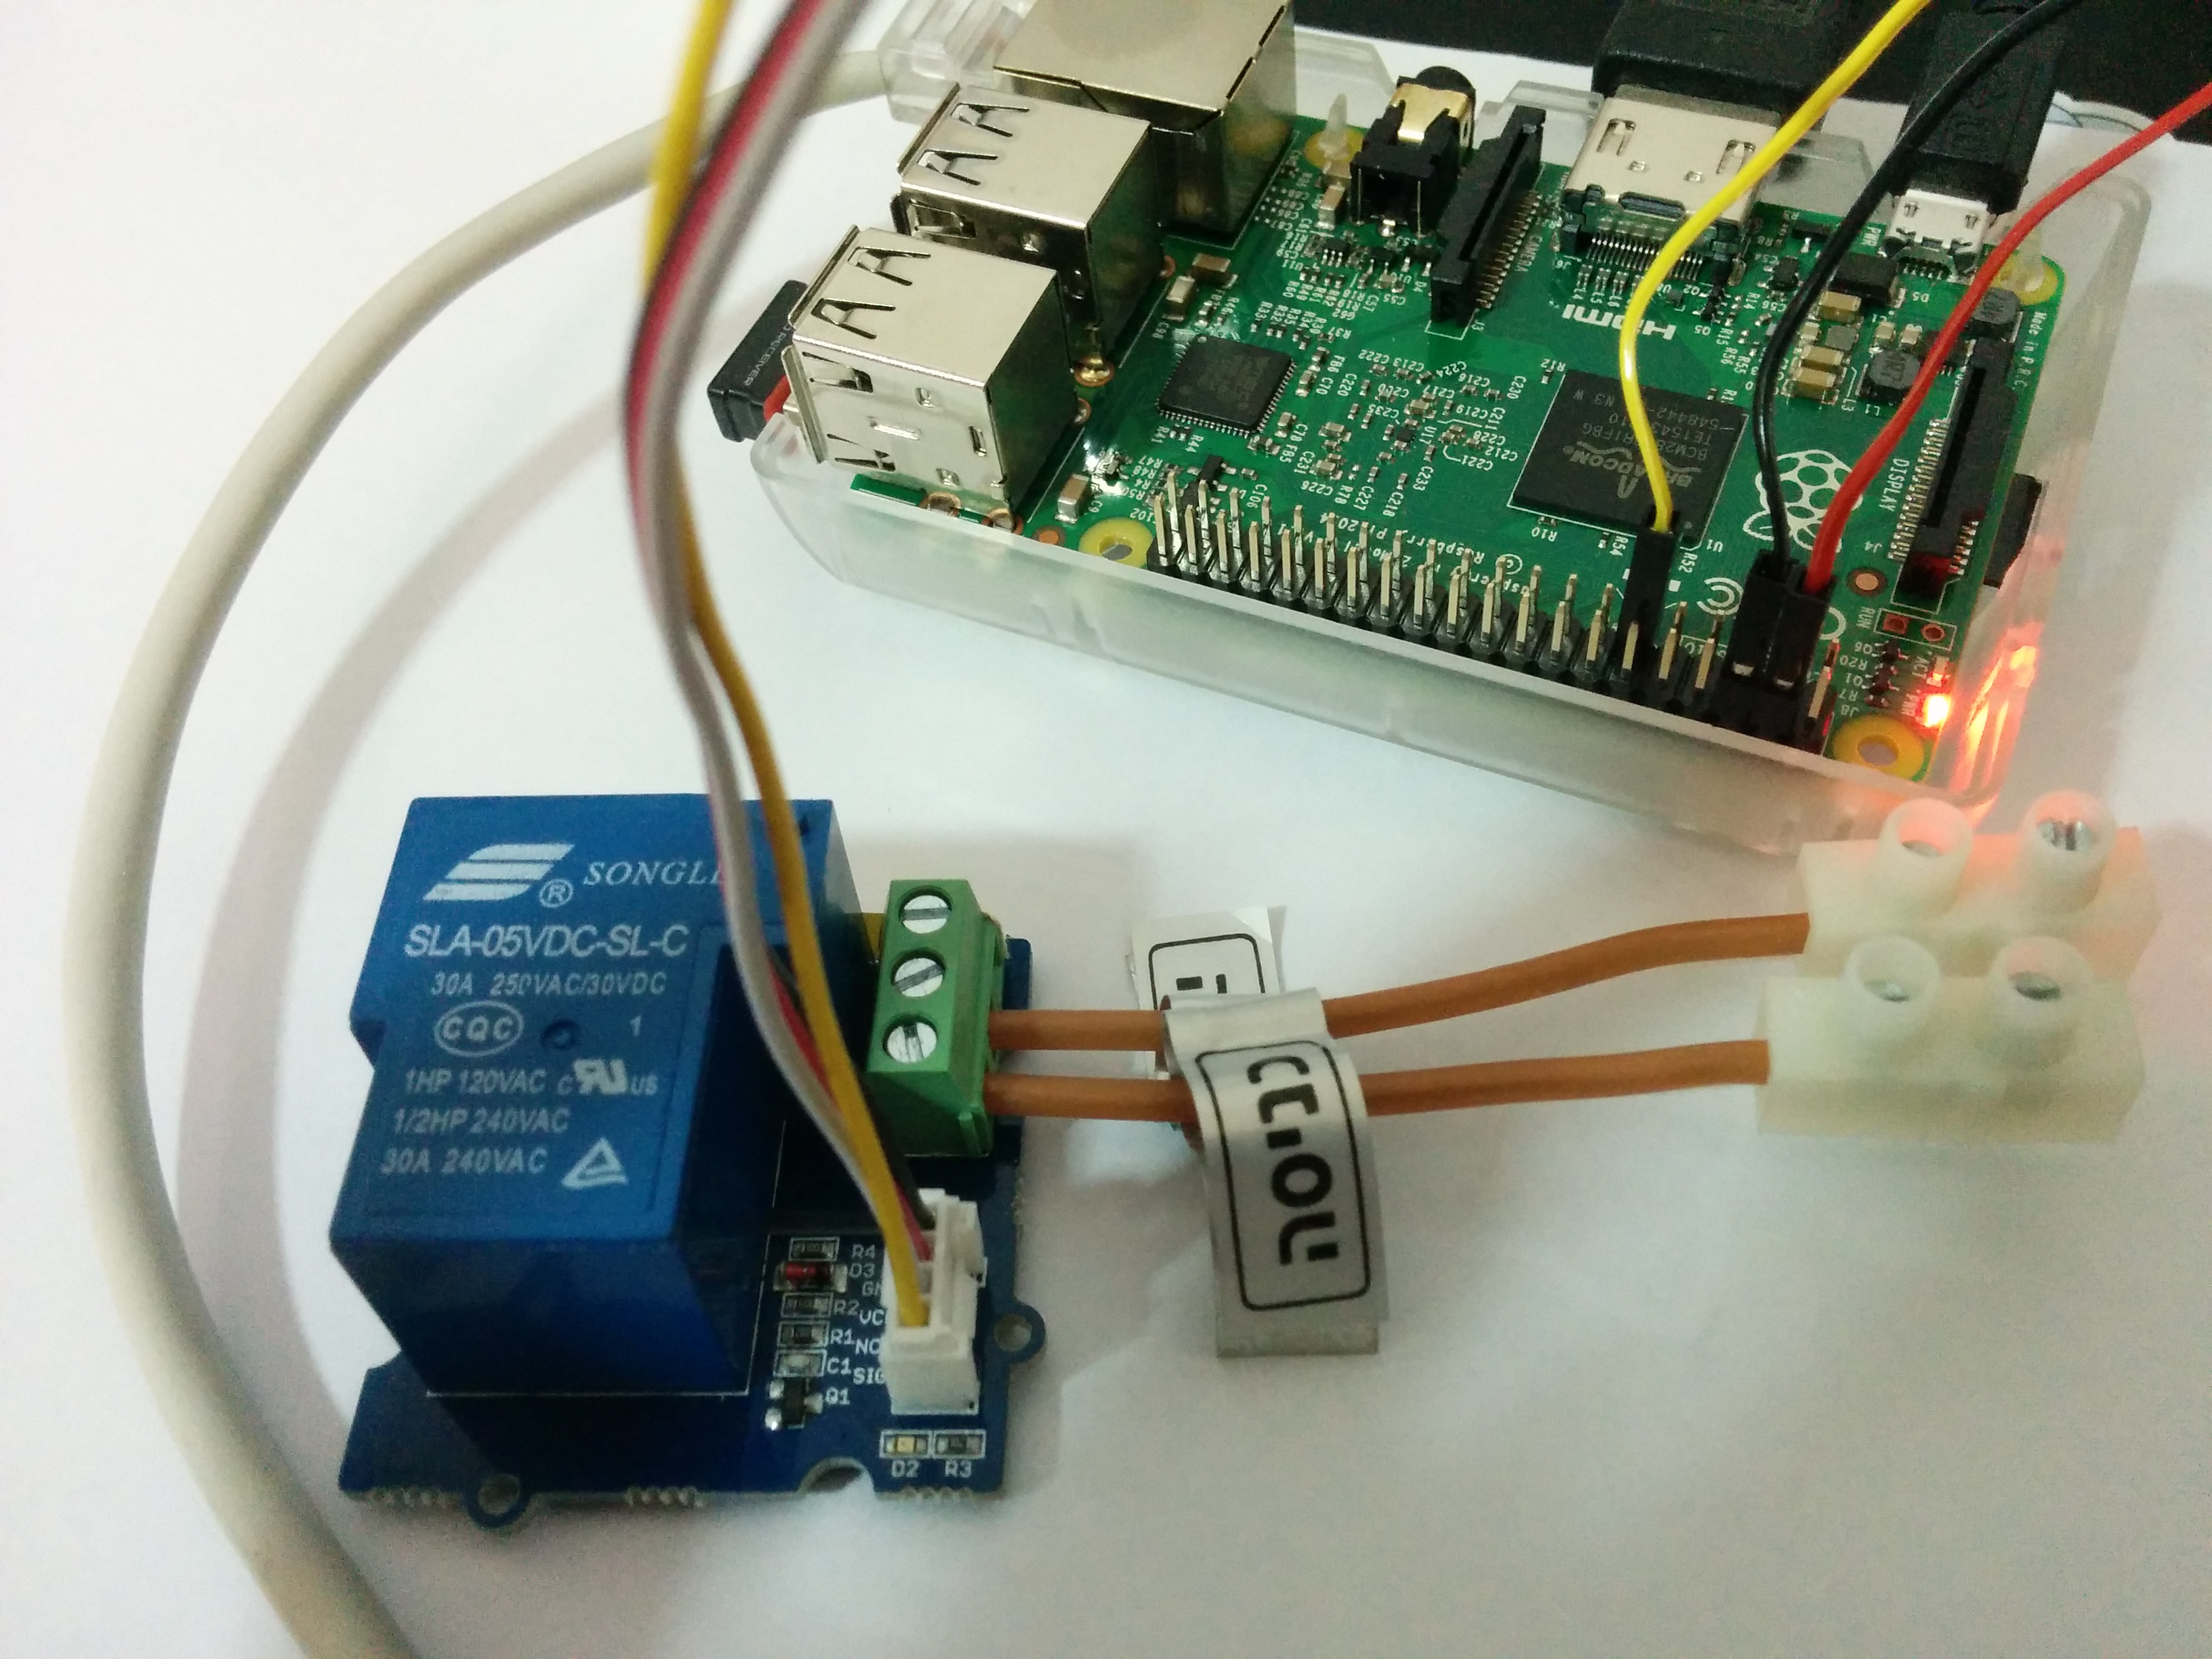
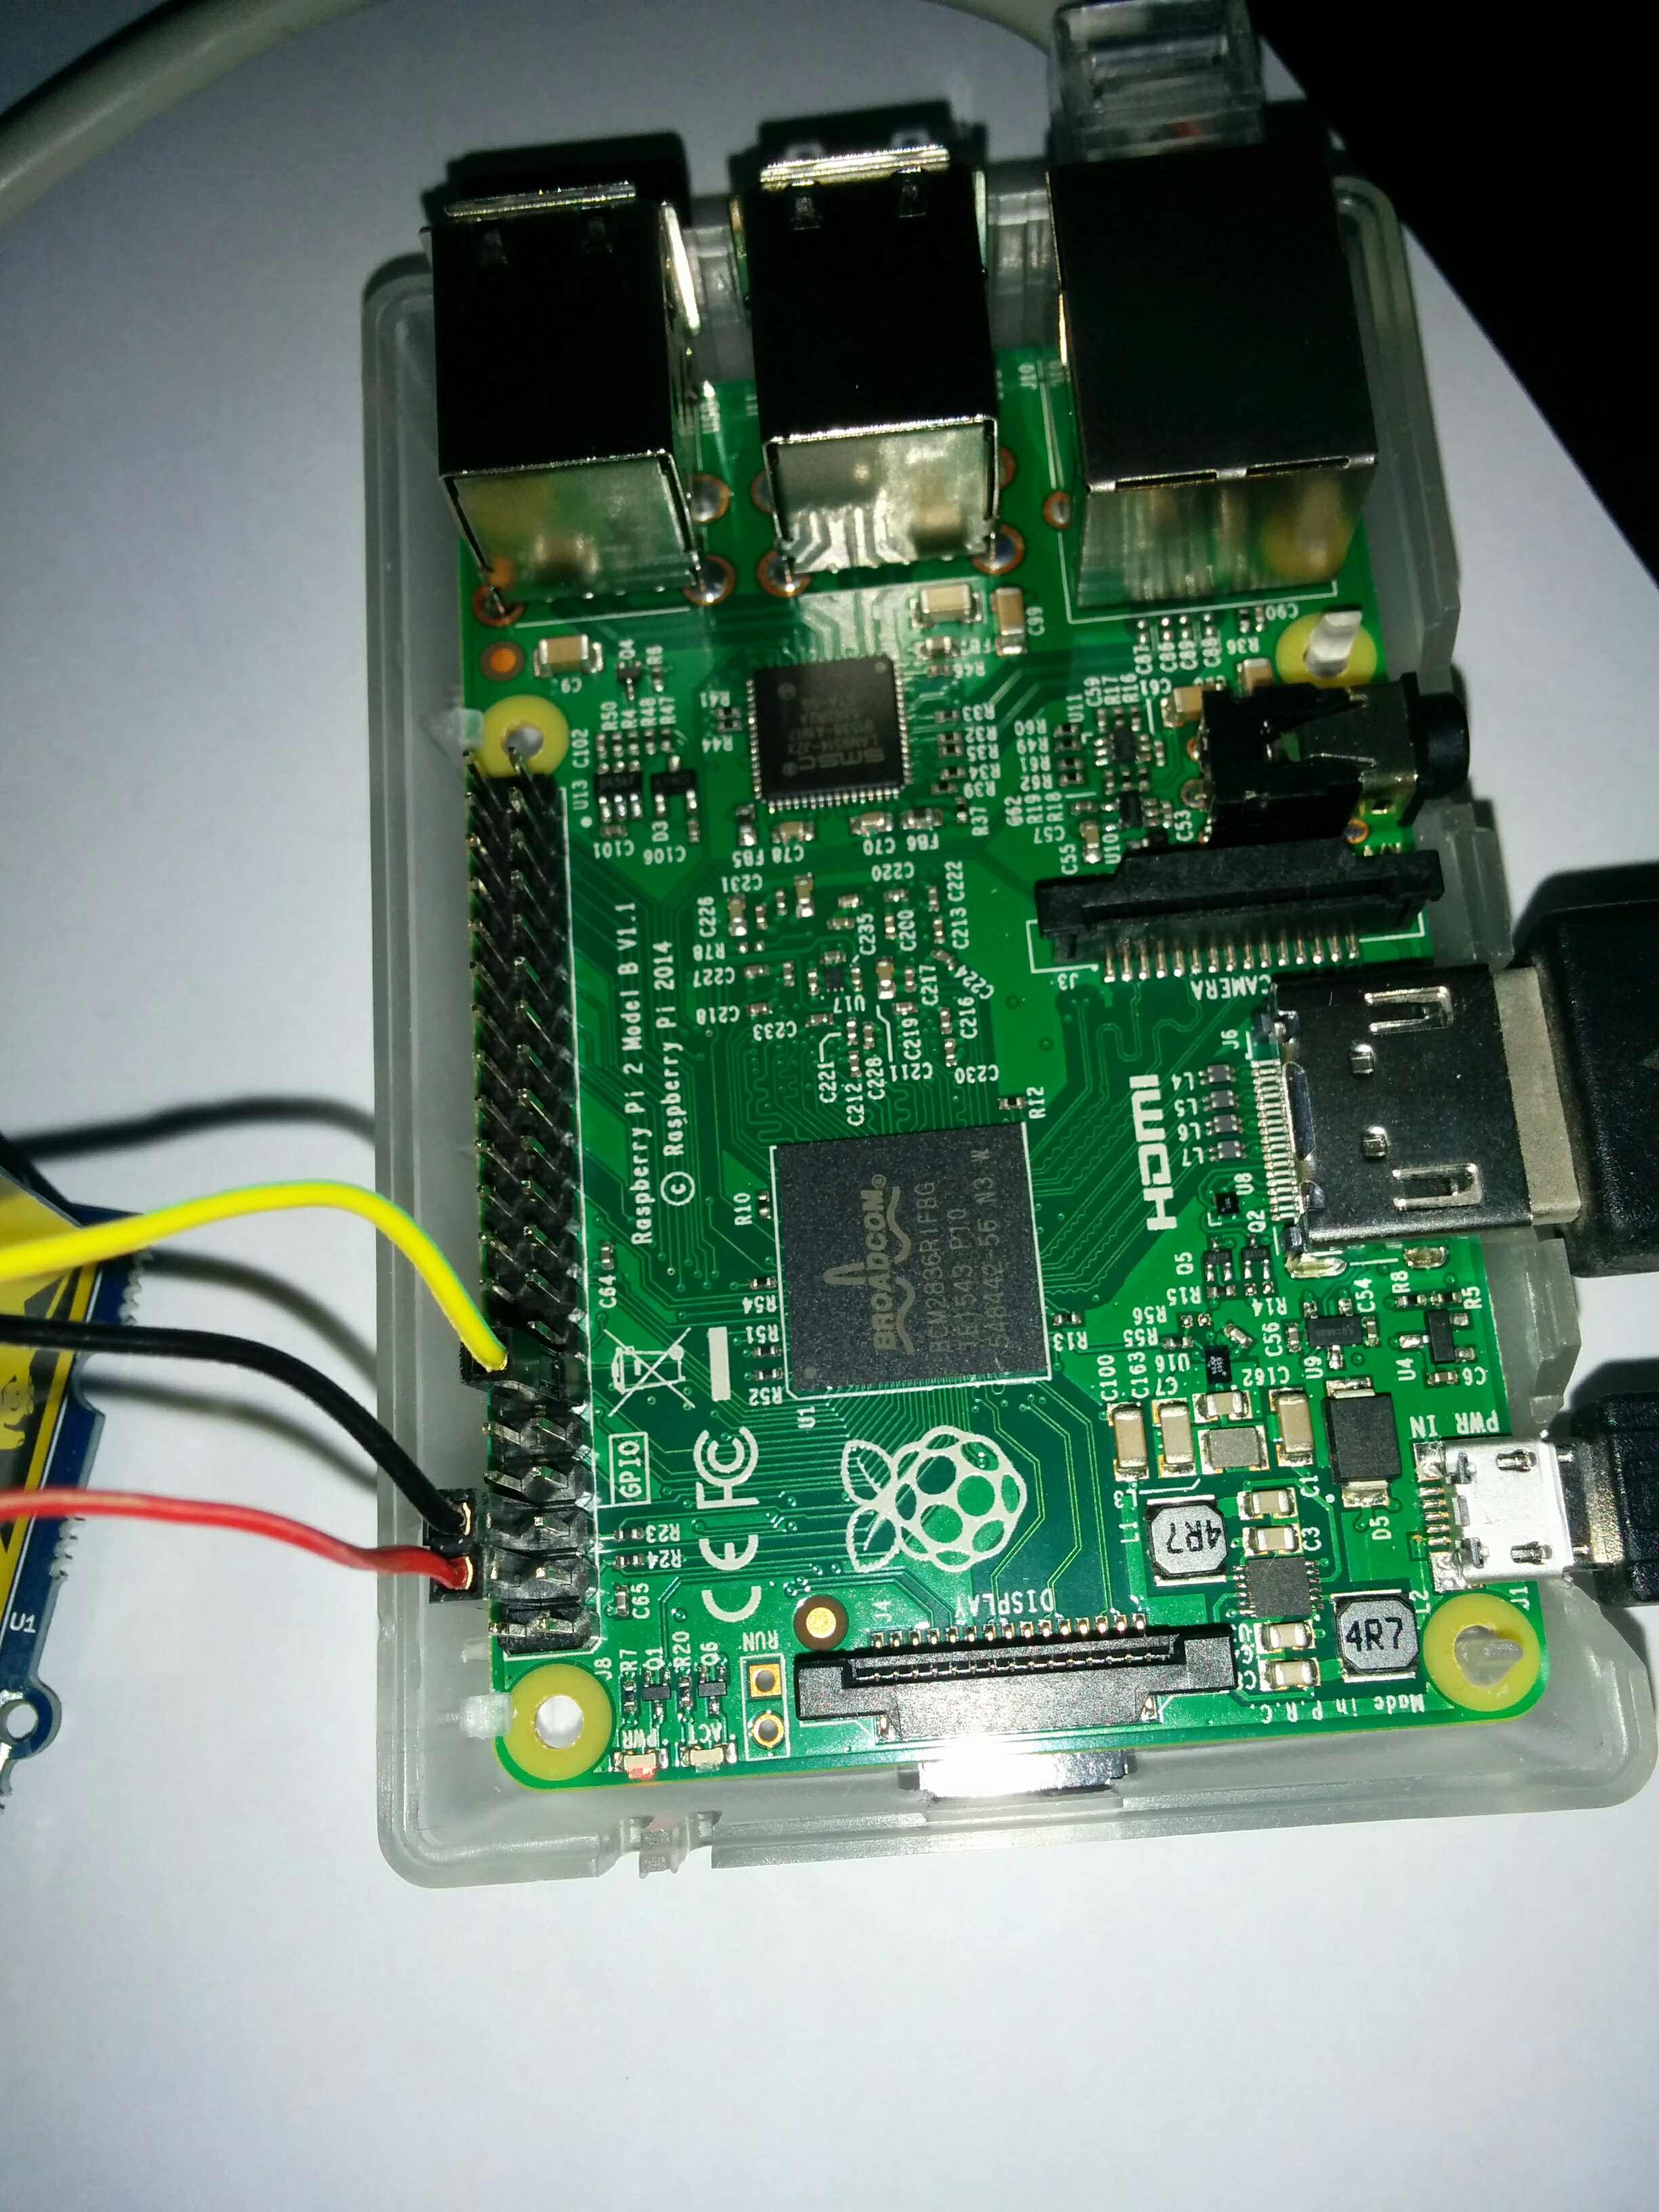
The pi controls the relay. The relay has 4 control pins: GND, VCC, NC, SIG. So, we should connect GPIO physical port 4 (VCC) to the relay VCC. Physical port 6 (Ground) to the relay's GND pin. And physical port 11 (GPIO 17) to the relay's SIG pin (the relay's NC pin is Not Connected). If you want to use a different GPIO pin for controlling the relay, simply modify CTL_OUT value in: relay.py.
This is how I have wired up my relay:  , and this
is how my pi is wired:
Wiring up the relay to the boiler
The relay is simply an electric switch. It has 3 connectors: NC (Normally Close), NO (Normally Open) and COM (Common). In order to connect the relay to the boiler we only need to connect the phase wire. Instead of connecting the phase wire to the manual switch (or a mechanical timer switch), connect it to the NO connector. Take the phase wire going out of the manual switch and connect it to the COM connector. Effectively, you have replace the mechanical switch with the relay, hence the relay that is controlled by the pi will determine whether the boiler will get current or not.
If requested, I will add some figures for demonstration purposes.
Raspberry Pi 2 Setup
You'll need to follow one of the (many) online tutorials on how to install Raspbian on your raspberry pi. Start with noobs or use a ready made image. Once you have Raspbian, make sure you have Python 2.7 installed.
Installation & Configuration
Next step is to clone the git repository and configure the app so it can access your calendar, send event notification (via push notifications and email), service credentials, etc.
$ echo "clone the git repository"
$ git clone https://github.com/wyaron/BoilerPlate.git
$ cd BoilerPlate/src/config
$ echo "install all required python packages..."
$ pip install -r requirements.txt
Once the git repository has been cloned and all required python packages have been installed, we need to set it up. The boiler application is using Google Calendar API in order to interact with your calendar. In order to do that, we must create a google project with calendar APIs enabled and allow it to read your calendar events. Sharing your calendar events is rather simple, in your google calendar settings you can choose to share your calendar with peers by providing their email addresses. The google project we are about to create will have a unique project id email assigned to it. We will share our calendar with this email address thus allowing it to read our calendar. In order to issue a REST request to this project, the client (our boiler controller application) will need a json file that we generate (credentials.json). This file is your secret so please do not distribute it.
Create a Google project to access our Calendar
Lets start with creating a google project for the controller to use.
- Open https://console.developers.google.com/projectselector/permissions/serviceaccounts
- Choose "Create a project..." from "Select a project" drop-down.
- Name you project
- Click "Create"
- On the new page opened, click on "CREATE SERVICE ACCOUNT"
- Name you service account
- Enter service ID
- Enable "Furnish a new private key" checkbox, choose JSON as the format
- Click Create
- A JSON file will be downloaded. This file should be placed at the config directory of our source tree (renamed to "credentials.json")
- In the Google API screen, enable the following APIs:
- Google Calendar API (for reading our calendar)
- Google Cloud Messaging (for sending push notification to our mobile device)
- Now, we create an API key that will be used to send push notifications to our mobile device.
- In the Google Credentials screen, click on the "Create Credentials" button.
- Choose "API Key"
- On the new paged opened, click on "Server Key"
- An API key will be generated.
Share your calendar with the Google project
OK, now that we have such a project, grab its email address. Lets assume the email address is: "myboilerservice@appspot.gserviceaccount.com". Go to your gmail calendar web site and click on settings. In the Calendar settings page, there are 3 tabs indicated by: "General", "Calendars" and "Labs" as shown in the following figure:
.
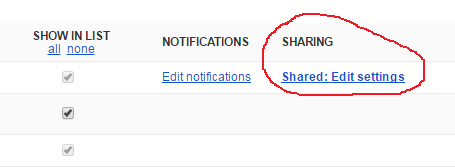
In this page, look for the sharing link under "SHARING":
 .
.
Once you click on it, you'll see a list of people with whom you would like to share your calendar. Go ahead and give our project (identified by its emails: "myboilerservice@appspot.gserviceaccount.com") an access to see all event details.
Configure Controller properties
Under the config directory in our repository, the file boiler_config.py holds the rest of the configuration attributes for our controller. This following table provides the meaning of each attribute and its default value. You must go over all the properties and make sure they make sense.
| Attribute | Purpose | Default |
|---|---|---|
| CALENDAR_ID | google calendar email (where we schedule the boiler events) | NA |
| GMAIL_USER | gmail user used for sending an email notification | NA |
| GMAIL_PASSWORD | gmail password of the user above | NA |
| EMAIL_TO | python list of recipients that will get the boiler events | NA |
| EMAIL_SUBJECT | the subject of the email notification from the boiler | "Boiler controller event" |
| PUSH_NOTIFICATION_API_KEY | API key you have generated in step #15 above | NA |
| boiler_summary_tags | types of boiler meeting strings used in the calendar | [boiler, dud, דוד, בוילר] |
| POLL_BOILER_EVENT_MINS | how often to poll google calendar for boiler events | 10 min |
| POLL_STATISTICS_SECS | how often to dump boiler activity statistics | 6 hours |
| MAX_BOILER_TIME_PER_DAY_HOURS | max hours we allow the boiler to be on per day | 6 hours |
| LOG_FILENAME | log file name | log/log_boiler.out |
| BOILER_LOG_LEVEL | logging level | logging.DEBUG |
| BOILER_CONSOLE_LOG_LEVEL | console logging level | logging.DEBUG |
Executing the boiler controller
Once everything is set up correctly, simply execute the following command:
$ echo "start clean (kills previous execution and temp files)"
$ sudo ./cleanup.sh
$ echo "run the boiler app"
$ ./src/boiler.py
Note that instead of running boiler.py you can simply invoke: boiler_run_forever.py which makes sure to restart the boiler application in case it crashed. If the boiler application is crashed, you will get an email with the log files attached so the bug can be traced down and fixed.
Once the application is running, you should see a message that summarized the boiler configurations.
Something like the following:
 Boiler Configuration
 ========================
 boiler_calendar_tags: [boiler, dud, דוד, בוילר]
 email_to: ['yaron.boiler@gmail.com']
 email_subject: Boiler controller event
 POLL_BOILER_EVENT_MINS: 10
 POLL_STATISTICS_SECS: 21600
 MAX_BOILER_TIME_PER_DAY_HOURS: 6
 log file names: [log/log_boiler.out]
Make sure you don't get any error messages in the console output. The boiler will attempt to read the calendar and is expected to send you an email with the above configuration.
Controller Operational Overview
This sections briefly explains how the controller operates. If you feel that you can improve it or make the code simpler, feel free to do so.
It is that simple. Really!
Once the boiler application starts, it attempts to read your calendar. The one that you have specified in CALENDAR_ID. The code attempts to read your calendar events for the next five hours (make sure your pi is synchronized or uses NTP). Now, the code simply tried to find the next boiler event. A boiler event is one that has an event summary (calendar event subject) that is one where the tags appear in: "boiler_calendar_tags". You can configure the tags to whatever string you like. The last two strings are the Hebrew translation for "boiler". If no boiler event was found, we will retry in POLL_BOILER_EVENT_MINS minutes. Otherwise. we keep the next boiler event in memory. If the event is about to start in less than POLL_BOILER_EVENT_MINS minutes, we will decrease the time we sleep to the deadline. Next, we check if the next boiler event is valid. If we have one, we check if we need to turn on the boiler (due time). If it is not the time, we wait again. This mechanism is very simple and allows us to respond to event cancellation very quickly. It also allow us to be operational if there is temporary connectivity issue. If we have a boiler event in memory, we will act accordingly. The code also makes sure to properly handle various crashes, for example, the controller upon restarting after a crash, turns off the boiler and reports the event.
The rest of the details can be found in the code.
Future Work
- Add an android/iOS application.
- Do we really need an API Key for sending push notifications? can we use the OAuth2 credentials instead?
- Add support for an electric valve - some boilers (in rather old apartments) require to close a water valve before turning on the boiler. If we can automate it as part of turning on the boiler it will be great.
- Add display to the controller - provide notifications and even maybe a way to manually create events. more ?